


Sliders are a staple in user interface design, offering a convenient way to interact with numerical data. However, picture this: you’ve got a bunch of products, and while most of them fall within a reasonable price range, there’s always that there’s always a select few that skyrocket in price, costing hundreds or even thousands of dollars. These outliers, standing out from the crowd, pose a unique challenge when it comes to designing sliders for filtering purposes.
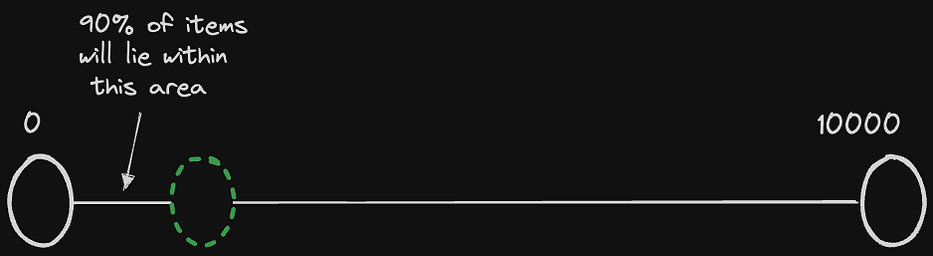
Take, for example, a web application where most items are priced between 0 and 100 USD, but a few can reach up to 500 or even 10,000 USD. Setting the upper limit of the slider at 10,000 USD seems logical, but distributing the range linearly can lead to wasted space, as 90% of items will be within a tiny section.
Traditional Slider
This is where innovative slider designs come into play, offering a solution to efficiently navigate through a wide range of values while optimising user interaction.
Luckily we can solve this problem using exponentials and logarithms!
Exponentials
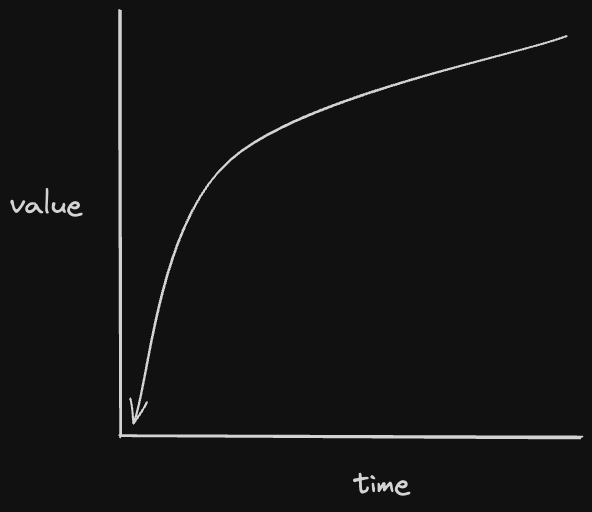
In simple terms, an exponentials is type a of a function that grows really fast — it’s a function that increases rapidly! Imagine starting with a tiny seed, and every minute it doubles in size, growing bigger and bigger in an exponential way.

Logarithms
Logarithms are opposite of exponentials. they decrease in value rapidly in a predictable manner. Now logs have a parameter which determines the rate of shrink. these are called bases. so for example log base 2 will make a value shrink by half and log base 10 shrink a value by 10 times.
Now that we have our basics cleared we can finally do some cool stuff
For this we are going to use rc-slider library which has support for multiple ranges and steps for our range.
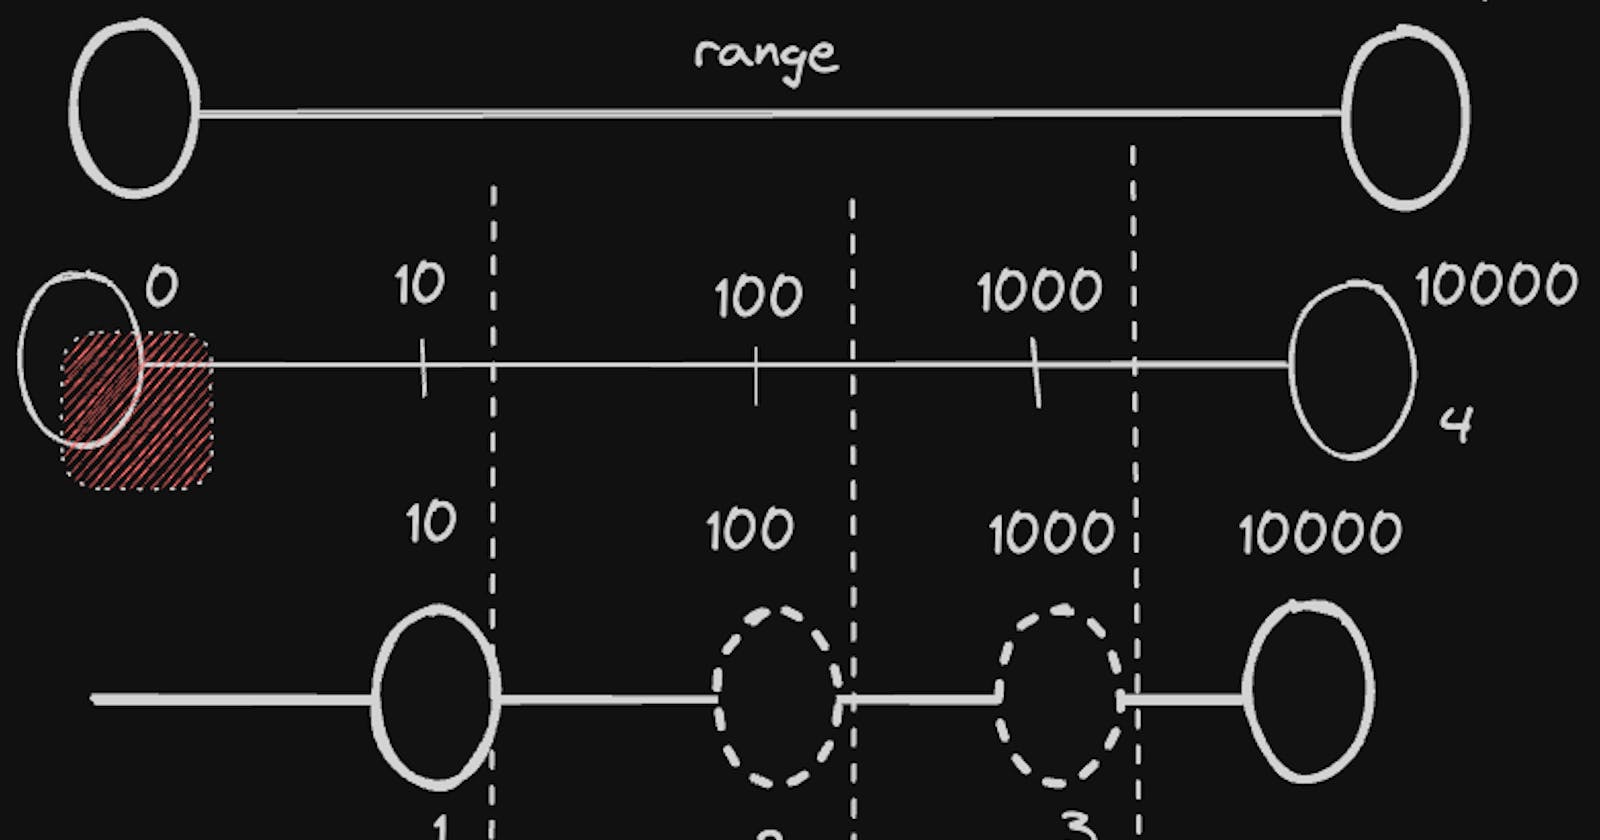
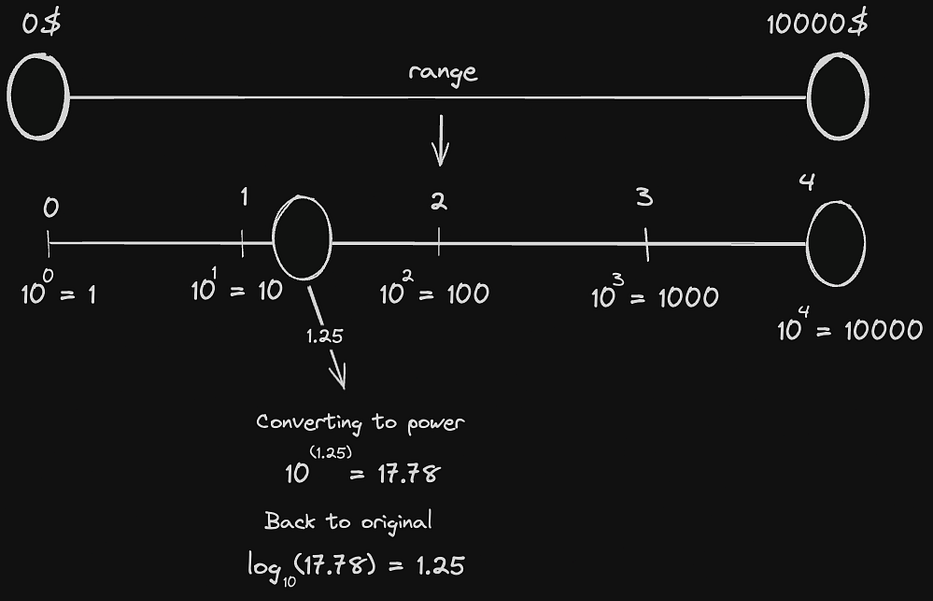
So for creating a range for 0 to 10000 instead of setting these values we will use 0 to 4. Why 4 you say? Because now we can use exponentials to convert them to our desired range
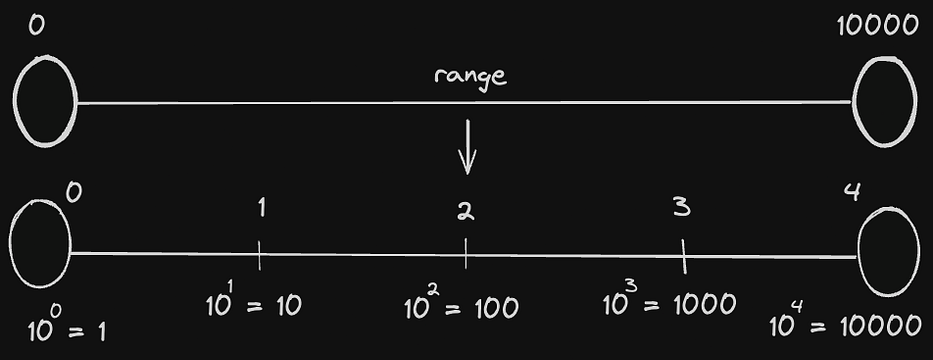
Also notice the difference from 100 to 1000 and 1000 to 10000. The amount of space allocated between values decreases exponentially.
Now with this we can create a function which will transform these values from 0 to 4 to exponential scale
const exponentialScale = (value: number) => {
    return Math.pow(10, value);
};
Lets see what our code looks so far
Couple of issues here
It’s jumps from 0 to 1
It never goes back to 0 once it’s moved
The slider goes beyond the right limits
for this we can add condition if value is ≤ 1 then we can return the same value
const exponentialScale = (value: number) => {
    if (value <= 1) {
      return value;
    }
    return Math.pow(10, value);
  };
Works for values between 0 and 1 but after 1 it jumps to 10
For this we can create another function that should convert the values of exponentials back to original form i.e using logs
Since have a step of 0.01 we can use log base 10 for converting exponential values back to original (basically reversing the exponential part)
const reverseExponentialScale = (value: number) => {
    if (value <= 1) {
      return value;
    }
    return Math.log10(value);
  };
// ...
<Slider
    min={Math.log10(MIN_VALUE)}
    max={Math.log10(MAX_VALUE)}
    step={0.01} //? Step set 0.01 for including cents
    range
    value={[
      reverseExponentialScale(minValue),
      reverseExponentialScale(maxValue),
    ]}
    onChange={handleChange}
  />
But we are missing one crucial thing. At 1 the output from exponential function becomes 10
We can fix this by adding and subtracting 1 in exponential and reverseExponentialScale functions respectively.
Let’s break down logic:
+1 Adjustment (Exponential Scaling):
User Perception: The user sees a range from 0 to 10000.
Internal Representation: Internally, the range is mapped from 0 to 5 for exponential scaling.
Slider Position: When the user slides to 100, it internally becomes 1.
Exponential Calculation: At 1,
Math.pow(10, value - 1)converts it toMath.pow(10, 0), resulting in 1.Compensating for Shift: To maintain consistency with the UI, +1 is added, aligning the exponential scale output with the displayed range.
-1 Adjustment (Logarithmic Scaling):
Slider Position: When the user slides to 1, it corresponds to 1 internally in the exponential scale.
Exponential Output: The exponential function returns 1.
Logarithmic Calculation: This 1 is passed to the
reverseExponentialScalefunction.Logarithmic Conversion:
Math.log10(1)equals 0.Shifting the Scale: To start the logarithmic scale from -1 (aligned with the UI), +1 is added to the logarithmic result, ensuring the scale starts from -1 and correctly reflects the UI.

With all this we can edit our code
And that’s it! our slider now supports all the cases!